
Det meste online træningsforløb har et stille problem: deltagerne møder op med slukkede kameraer, lydløs og mentalt et andet sted.
Du leverer indholdet. Du spørger, om alle følger med. Stilhed. Et høfligt "ja" i chatten. Og du aner ikke, om der er landet noget.
Omkostningerne er målbare: AhaSlides-forskning fandt, at 66.1 % af fagfolk siger, at distraktion reducerer informationshukommelse, og 63.3 % rapporterer, at det giver svagere læringsresultater.
Denne guide dækker 20 specifikke fremgangsmåder, som L&D-professionelle og virksomhedstrænere kan bruge til at ændre dette mønster, lige fra forberedelse før sessionen til måling.
💡Hurtige tips: Brug disse fem praktiske tips til interaktiv virtuel træning for dit team.
Hvad virtuel træning egentlig er
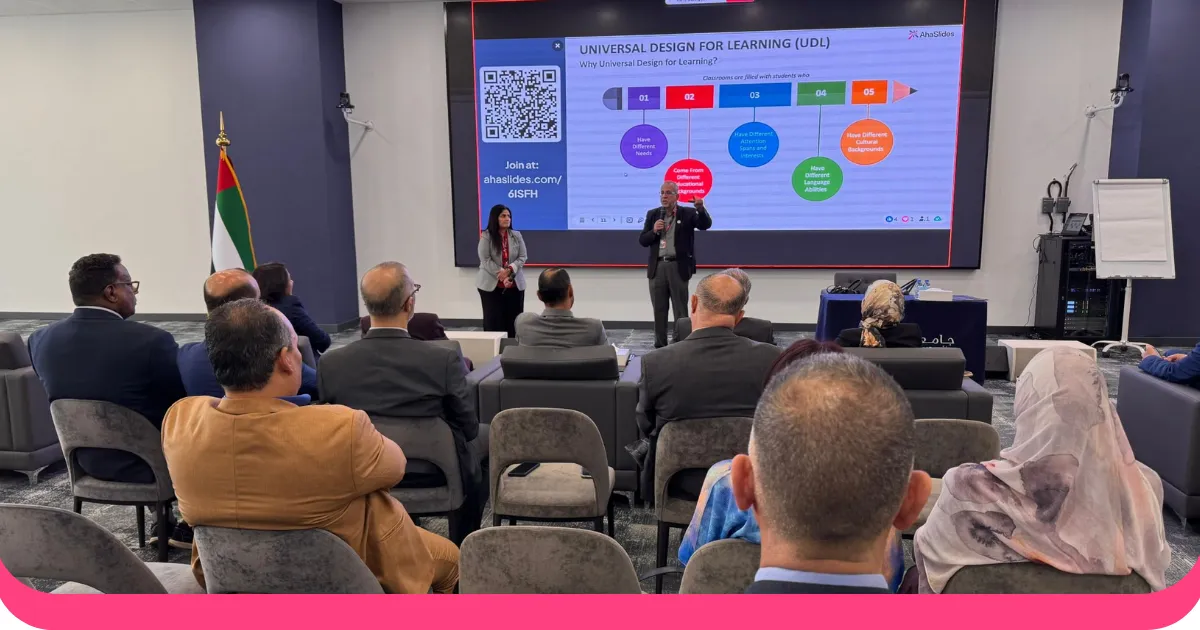
Virtuel træning er instruktørledet læring, der leveres live via videokonferencer, hvor undervisere og deltagere har fjernforbindelse i realtid. Det er ikke det samme som e-læring i eget tempo.
Sondringen er vigtig. Virtuel træning bevarer den realtidsbaserede interaktion i klasseundervisningen: live spørgsmål og svar, gruppediskussioner, færdighedsøvelser og øjeblikkelig feedback. Det, der ændrer sig, er leveringsmediet, og det medie introducerer specifikke udfordringer, der kræver specifikke svar.
For de fleste L&D-teams foregår virtuel træning via Zoom, Microsoft Teams eller Google Meet med supplerende værktøjer, der håndterer afstemninger, whiteboards og publikumsrespons.
Hvorfor organisationer har fortsat virtuel træning efter pandemien sluttede
Pandemien accelererede adoptionen, men omkostnings- og skalaargumenter har holdt den på plads.
Omkostningsargumentet er ligetil. Ved at fjerne rejser, leje af lokaler og trykte materialer reduceres udgifterne pr. person til træning betydeligt. For organisationer, der træner hundredvis eller tusindvis af medarbejdere årligt, forværres denne forskel hurtigt.
Skala er den anden drivkraft. En underviser, der kan nå 30 personer i et klasseværelse, kan nå 300 i en virtuel session uden en proportionel stigning i omkostninger eller indsatsFor compliance-træning, onboarding og opdatering af færdigheder, der skal nå ud til en distribueret arbejdsstyrke, er virtuel levering simpelthen mere praktisk end alternativet.
Fleksibilitet er også vigtig. Deltagere i forskellige tidszoner, forskellige kontorer eller forskellige arbejdsplaner kan alle få adgang til den samme session. Optagelse af sessionen udvider dens rækkevidde yderligere: personer, der ikke kunne deltage live, kan se med bagefter, og indholdet bliver et genbrugeligt aktiv i stedet for en engangsbegivenhed.
Ulempen er, at det er sværere at gøre online levering engagerende. Det er det problem, som denne guide adresserer.
Almindelige udfordringer og hvad man kan gøre ved dem
Fraværet af fysisk tilstedeværelse og kropssprogssignaler er den mest fundamentale forskel fra undervisning i klasseværelset. Video i høj kvalitet, en kameranorm og hyppige forståelsestjek kompenserer for det, man ikke kan læse i lokalet.
Distraktioner hjemme og på arbejdspladsen er forudsigelige. At fastsætte normer for deltagelse på forhånd, indbygge regelmæssige pauser og bruge aktiviteter, der kræver en aktiv respons i stedet for passiv lytning, reducerer alt sammen tiltrækningen fra konkurrerende opmærksomhed.
Tekniske fejl vil forekomme. Test af alt 48 timer før sessionen, en backupplan for hvert interaktivt element og en sekundær kontaktmetode klar betyder, at et teknisk problem bliver en kort forsinkelse snarere end en afsporet session.
Lav deltagelse er normalt et strukturelt problem, ikke et motivationsproblem. Tilføjelse af et interaktivt øjeblik hvert 10. minut i stedet for hvert 45. minut ændrer standardindstillingen fra passiv til aktiv.
Det er svært at styre diskussioner i en hel gruppe virtuelt. Grupperum med klare opgaver og tildelte roller giver bedre resultater end åbne samtaler med 20 personer og én knap til at slå lyd til.
Opmærksomhedstræthed sætter ind hurtigere online end personligt. At begrænse sessioner til 90 minutter og opdele længere indhold over flere kortere sessioner er ikke et kompromis, det er bedre undervisningsdesign.
Forberedelse før sessionen
1. Lær platformen at kende, før deltagerne logger ind
Platformfumler undergraver hurtigt trænerens troværdighed. Kør mindst to fulde prøver på din faktiske platform før aflevering. Test hvert interaktivt element, hver videoindlejring, hver overgang. Hav en fejlfindingsguide på én side åben for de fem mest sandsynlige tekniske fejl under sessionen.
Et ResearchGate-studie om onlineundervisning viste, at tekniske vanskeligheder under undervisning øger frafaldsprocenter og reducerer vidensoverførsel [1].
2. Investér i udstyr, der ikke kæmper mod dig
Dårlig lyd er den hurtigste måde at miste et virtuelt rum på. Deltagerne vil udholde lidt kornet video i langt længere tid end hakkende lyd.
Minimumsopsætning til professionel levering: et 1080p webcam placeret i øjenhøjde, et headset eller en ekstern mikrofon med støjreduktion, en stabil kablet internetforbindelse med et mobilt hotspot som backup og et godt oplyst område, hvor lyskilden er foran dig i stedet for bag dig. En anden skærm eller enhed til overvågning af chat og deltagernes reaktioner uden at skifte vindue er værd at tilføje, hvis du afholder sessioner regelmæssigt.
Lyden er vigtigst. Deltagerne vil tolerere let forringet video i langt længere tid end de vil tolerere hakkende eller ekkopræget lyd. Hvis du skal vælge, hvor du vil bruge penge, så brug penge på mikrofonen.
3. Send materialer før sessionen, der understøtter læringen
Engagementet kan starte, før nogen logger ind. En kort afstemning før sessionen, hvor deltagerne bliver bedt om at vurdere deres nuværende selvtillid i forhold til emnet, giver dig basisdata og får deltagerne til at tænke over emnet på forhånd.
Andre muligheder: en to-minutters forklarende video, der dækker platformens navigation, et enkelt refleksionsspørgsmål sendt via e-mail eller en kort læsning, der giver gruppen et fælles ordforråd.
4. Lav en sessionsplan med uforudsete forhold
En sessionsplan er et minut-for-minut-kort, der fortæller dig, hvilket segment der kommer derefter, hvad den tilsigtede aktivitet er, og hvad du gør, hvis det varer længe, eller teknologien fejler.
En sessionsplan har fem elementer. Læringsmål kommer først: specifikke, målbare resultater, der definerer, hvad deltagerne skal kunne gøre eller forklare ved afslutningen. Vage mål som 'forstå emnet' er ikke nyttige; 'forklar de tre faser i processen og identificer hvilken fase der er mest relevant for deres rolle' er.
Timing pr. segment kommer derefter: en planlagt varighed for hver blok plus et fleksibelt vindue, der absorberer overskridelser uden at komprimere alt, der følger. Leveringsmetode følger: om hvert segment er en præsentation, en diskussion, en aktivitet eller en vurdering, skrevet eksplicit, så der ikke er nogen tvetydighed om, hvad der sker hvornår.
Interaktive elementer har brug for deres egen kolonne: det specifikke værktøj og prompt for hvert berøringspunkt, ikke bare 'afstem her'. En prompt skrevet på forhånd er altid skarpere end en improviseret under pres.
Endelig, backupplaner for hvert trin, hvor teknologien kan svigte. Hvad sker der, hvis afstemningen ikke indlæses? Hvad sker der, hvis en deltager ikke kan få adgang til breakout-rummet? En plan, der er skrevet før sessionen, tager to minutter. Et improviseret svar under sessionen tager ti minutter og koster rummets opmærksomhed.
Hvis du har afsat 90 minutter, så planlæg med 75 minutters indhold. De 15 minutter kan absorbere spørgsmål, tekniske forsinkelser og samtaler, der er værd at forlænge.
5. Log ind 15 minutter før tid
Mød op før deltagerne. Disse tidlige minutter giver dig mulighed for at teste lyd og video, hjælpe deltagerne med at fejlfinde forbindelsesproblemer, før sessionen starter, og opbygge en uformel rapport. Deltagere, der føler sig set, før træningen starter, er mere tilbøjelige til at bidrage, når det sker.
Sessionsstruktur
6. Sæt forventningerne i de første fem minutter
De første minutter bestemmer deltagelsesmønsteret for alt, der følger. Hvis du bruger dem på at tale til folk, etablerer du en passiv oplevelse. Hvis du afholder en interaktiv aktivitet, etablerer du det modsatte.
Start med sessionens dagsorden, hvordan deltagerne skal engagere sig, hvilke værktøjer de vil bruge, og grundregler for diskussion. Sessioner, der åbner med klare deltagelsesnormer, oplever betydeligt højere engagement gennem hele sessionen [2].
7. Hold sessionerne på 90 minutter eller mindre
Deltagerne håndterer hjemmemiljøer, notifikationer og den kognitive belastning af forlænget skærmtid. For indhold, der kræver mere end 90 minutter, opdel det i flere kortere sessioner over flere sammenhængende dage. Fire sessioner på 60 minutter giver konsekvent bedre hukommelse end en enkelt firetimers blok, fordi spredt læring giver hjernen tid til at konsolidere information mellem eksponeringer [3].
8. Indbyg pauser hver 30-40 minutter
Pauser er en kognitiv nødvendighed, ikke en udfyldning af tidsplanen. Hjernen konsoliderer information under hvile, og vedvarende fokus uden afbrydelse giver et aftagende udbytte af hukommelsen [3]. Fem minutter hver 30-40 minutter er minimum. Fortæl deltagerne pauseplanen på forhånd, så de kan planlægge omkring den, og slut til tiden.
9. Styr timing med præcision
Når en underviser konsekvent forlænger samtalen, begynder deltagerne at miste fokus, før sessionen slutter, fordi de ved, at de er for sent til deres næste aftale. Giv realistiske tidsestimater til hvert segment. Brug en lydløs timer. Identificer to eller tre fleksible sektioner, der kan forkortes om nødvendigt, og fortæl deltagerne eksplicit, hvornår du forlænger en diskussion, og hvad du skærer for at kompensere.
10. Anvend 10/20/30-reglen på præsentationer
Ikke mere end 10 slides, ikke længere end 20 minutter, ingen skriftstørrelse mindre end 30 point [4]. Skrifttypebegrænsningen begrænser naturligvis slidetætheden: hvis din skrifttype er stor nok til at kunne læses på en lille bærbar computerskærm, kan du ikke få plads til tekstafsnit, hvilket tvinger dig til at præsentere ideer i stedet for at transskribere dem. Brug slides til at indramme koncepter; gå videre til aktiviteter til anvendelse.
Fremdrift af deltagelse
11. Skab et interaktivt øjeblik i de første fem minutter
En hurtig afstemning, en ordsky aktivitet, eller en enkelt chatprompt får deltagerne til at svare med det samme. Deltagere, der bidrager én gang tidligt, er betydeligt mere tilbøjelige til at fortsætte med at deltage hele vejen igennem.
12. Tilføj et interaktionspunkt hvert 10. minut
Engagementet falder kraftigt efter 10 minutters passivt indhold. Problemet forværres i virtuelle omgivelser: AhaSlides-forskning fandt ud af, at 41.9 % af deltagerne angiver skærmtræthed som en ledende årsag til distraktion, hvilket gør fjernundervisning til en særlig høj risiko for opmærksomhedstab. En rimelig kadence: ét interaktivt øjeblik i de første fem minutter for at etablere deltagelse, derefter et interaktionspunkt hvert 10. minut i løbet af sessionen. Det betyder, at en 60-minutters session har cirka fem til seks berøringspunkter, ikke én afstemning til sidst.
Formatet kan variere: en hurtig afstemning, en ordsky, en chatprompt, en opgave i et grupperum eller en anonym Q&A-indsendelse. Ved at rotere formatet forhindres interaktionerne i at blive forudsigelige, hvilket er det, der får dem til at miste deres effekt over tid.
13. Brug grupperum til ansøgning, ikke kun diskussion
Små grupper på tre til fem personer skaber psykologisk tryghed for deltagere, der ikke taler i fuld gruppe. Den fejl, de fleste undervisere begår, er at sende folk til grupperum med en vag diskussionsprompt. Giv dem en opgave med en leverance: en casestudie, der skal løses, et problem, der skal diagnosticeres, et udkast, der skal produceres. Tildel roller, giv mindst 10 minutter, og afrapporter derefter resultaterne med hele gruppen.
14. Bed om kameraer tændt, uden at kræve dem
Videotilstedeværelse øger ansvarlighed, men kamerapåbud skaber vrede, når deltagerne har legitime grunde til at afslå: delte hjemmeområder, båndbreddebegrænsninger eller videoopkald i træk. Forklar, hvorfor kameraer hjælper, spørg snarere end kræve, og tilbyd kamerapauser under længere sessioner. Sessioner, hvor 70 % eller flere af deltagerne har kameraer tændt, har en tendens til at generere mere diskussion og højere tilfredshedsscorer efter sessionen [2].
15. Brug navne
At kalde en deltager ved navn konverterer en udsendelse til en samtale. "God pointe, Sarah, hvem har ellers oplevet dette?" signalerer, at du læser rummet. Deltagere, der føler sig individuelt anerkendt, er mere tilbøjelige til at bidrage igen.
Værktøjer og aktiviteter
16. Brug isbrydere med et professionelt formål
Isbrydere får skepsis, fordi mange er useriøse. Dem, der virker, er direkte relateret til emnet, man træner.
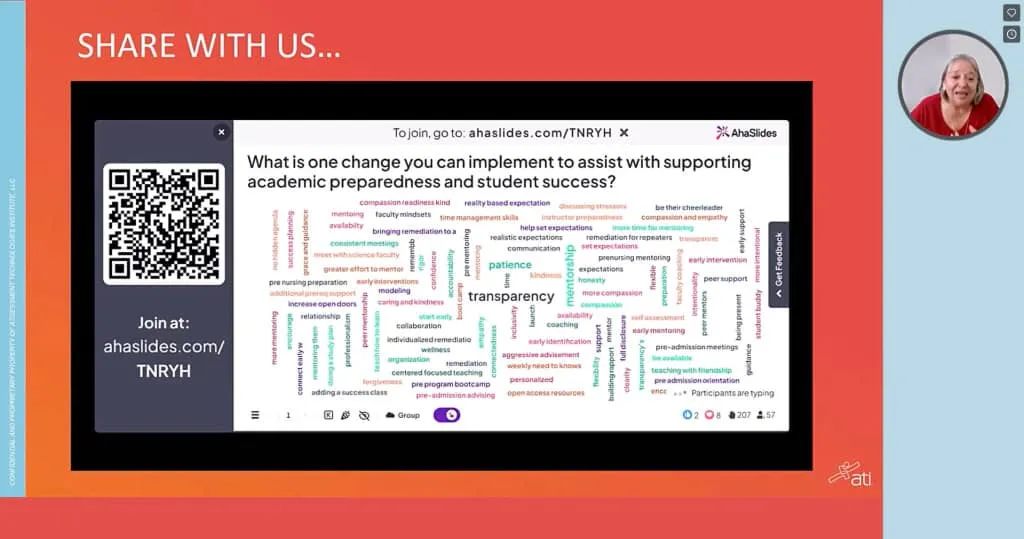
Til en session om kommunikationsevner: "Beskriv din kommunikationsstil med ét ord." Vis svarene som en ordsky. Spredningen af svar viser straks gruppen, at folk griber kommunikation forskelligt an, hvilket er præmissen for hele sessionen.
Til en session om forandringsledelse: 'Hvad er én forandring på arbejdet, der gik bedre end forventet?' Indsaml svar anonymt. Svarene får folk til at tænke positivt om forandring, før du introducerer rammerne.
Til en compliance-træningssession: "På en skala fra et til fem, hvor sikker er du på, at du kan forklare denne politik til en ny kollega?" Baseline-dataene former dit tempo i sessionen, og deltagere, der vurderer sig selv lavt, er allerede klar til at være opmærksomme.
Princippet er det samme i begge tilfælde: isbryderen udfører rigtigt arbejde, ikke opvarmningsarbejde.
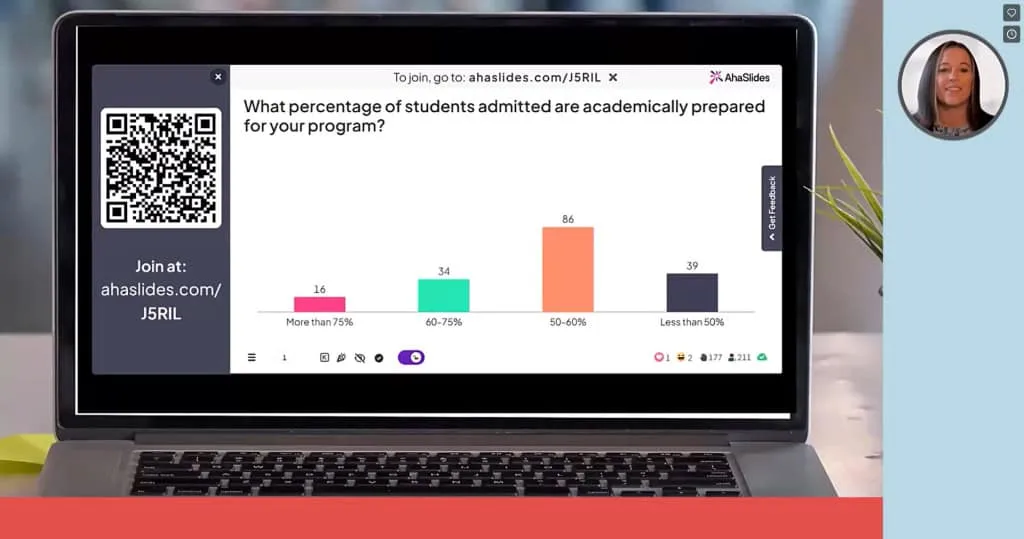
17. Kør live-afstemninger for at tilpasse dig i realtid
Meningsmålinger er mest værdifulde, når man handler på resultaterne. interaktiv afstemning At 60 % af deltagerne vurderer deres selvtillid til 3 ud af 10, er et signal om at sætte farten ned, før man går videre. Effektive afstemningsmomenter: baseline før træningen, forståelsestjek midt i sessionen, scenariebaserede anvendelsesspørgsmål og en selvtillids- og takeaway-kontrol efter sessionen.
18. Brug åbne spørgsmål til at fremhæve reel tænkning
Afstemninger indsamler effektivt data. Åbne spørgsmål afslører, hvordan folk rent faktisk tænker om et problem. "Hvilke udfordringer forventer du, når du anvender dette?" afslører reelle hindringer, som en standardiseret forståelseskontrol ville overse. Åbne spørgsmål fungerer godt i chat, på fælles whiteboards eller som oplæg til diskussioner.
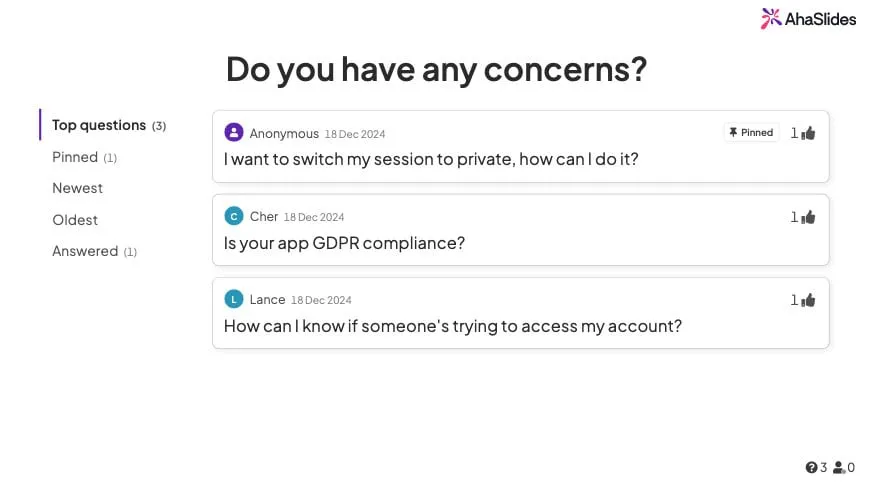
19. Indbyg anonyme spørgsmål og svar i sessionsstrukturen
"Nogen spørgsmål?" til sidst skaber pålidelig stilhed. Frygten for at virke uvidende er reel, og den er stærkere online, fordi spørgsmål føles mere synlige. AhaSlides' spørgsmål og svar-funktion giver deltagerne mulighed for at indsende spørgsmål anonymt og stemme op for de mest relevante. Anonym indsendelse genererer konsekvent flere spørgsmål end formater udelukkende med verbale svar, og ved at opbygge spørgsmåls- og svarpunkter i løbet af sessionen bliver bekymringer behandlet, mens emnet stadig er på skærmen.
20. Brug quizzer som et læringsværktøj, ikke en test
Testeffekten, et af de mest replikerede fund inden for kognitiv psykologi, viser, at det at genfinde information fra hukommelsen styrker den mere end at gennemgå det samme materiale igen [5]. En quiz med to spørgsmål efter hvert hovedbegreb gør mere for hukommelsen end at opsummere begrebet en gang til.
Praktiske formater til videnstjek-quizzer: en multiple choice-quiz med to eller tre spørgsmål efter hvert hovedbegreb, et skriv-svar-spørgsmål, hvor deltagerne husker et specifikt udtryk eller en ramme uden opfordringer, et scenariebaseret spørgsmål, der beder deltagerne om at anvende det, de lige har lært, i en realistisk situation, eller en match-pairs-aktivitet, hvor deltagerne forbinder begreber med definitioner eller eksempler.
Hold hver quiz kort. To spørgsmål efter en konceptblok er nok til at aktivere genfinding uden at gøre sessionen til en eksamen. Målet er at styrke hukommelsen, ikke at vurdere præstationen, så det er vigtigt at formulere sig med lav risiko. "Lad os se, hvordan det her ender, før vi går videre" fungerer bedre end "tid til en quiz".
Måling af om træningen virkede
Indsamling af feedback umiddelbart efter en session indsamler tilfredshedsdata. Det fortæller dig ikke, om læringen blev omsat til arbejde.
En komplet målemetode dækker fire niveauer, hentet fra Kirkpatrick-modellen, som fortsat er den mest anvendte ramme for evaluering af træning.
Det første er reaktion: Synes deltagerne, at sessionen var værdifuld? En kort spørgeskemaundersøgelse efter sessionen, der dækker indholdets relevans, underviserens effektivitet og den generelle tilfredshed, afdækker dette. Det er det nemmeste niveau at måle og det mindst prædiktive for faktisk læring.
Det andet er læring: ændrede viden eller selvtillid sig? En før- og eftervurdering af selvtilliden på kernemnet, kombineret med et kort videnstjek, giver dig en før-og-efter sammenligning. AhaSlides gør dette ligetil: kør den samme afstemning i starten og slutningen af sessionen og sammenlign fordelingene.
Det tredje er adfærd: anvender deltagerne det, de har lært? En 30-dages opfølgningsundersøgelse med et eller to specifikke spørgsmål om jobansøgning er minimum. Lederobservation eller peer-feedback tilføjer mere signal.
Det fjerde er resultater: flyttede træningen en forretningsmåling? Dette er det sværeste niveau at måle rent, fordi mange variabler påvirker resultaterne. Hvor det er muligt, identificer én måling, som træningen skal påvirke, baseline den før programmet, og tjek den 90 dage senere.
De fleste træningsprogrammer måler kun niveau et. Det tager 10 minutter at tilføje niveau to. Det kræver én opfølgende e-mail at tilføje niveau tre. Forskellen mellem, hvad organisationer måler, og hvad der rent faktisk ville fortælle dem, om træningen virkede, er næsten udelukkende et spørgsmål om vane, ikke indsats.
Det er ved 30-dages og 90-dages opfølgninger, at de fleste træningsmålinger ikke lever op til forventningerne. En enkelt opfølgende undersøgelse kræver minimal indsats og afslører, om sessionen havde en varig effekt.
Brug af AhaSlides til virtuel træning
Ovenstående engagementspraksisser fungerer bedst, når de integreres i sessionen, i stedet for at kræve, at deltagerne skifter mellem platforme. Jonglering med flere værktøjer skaber friktion, der underminerer den interaktion, den skal muliggøre.
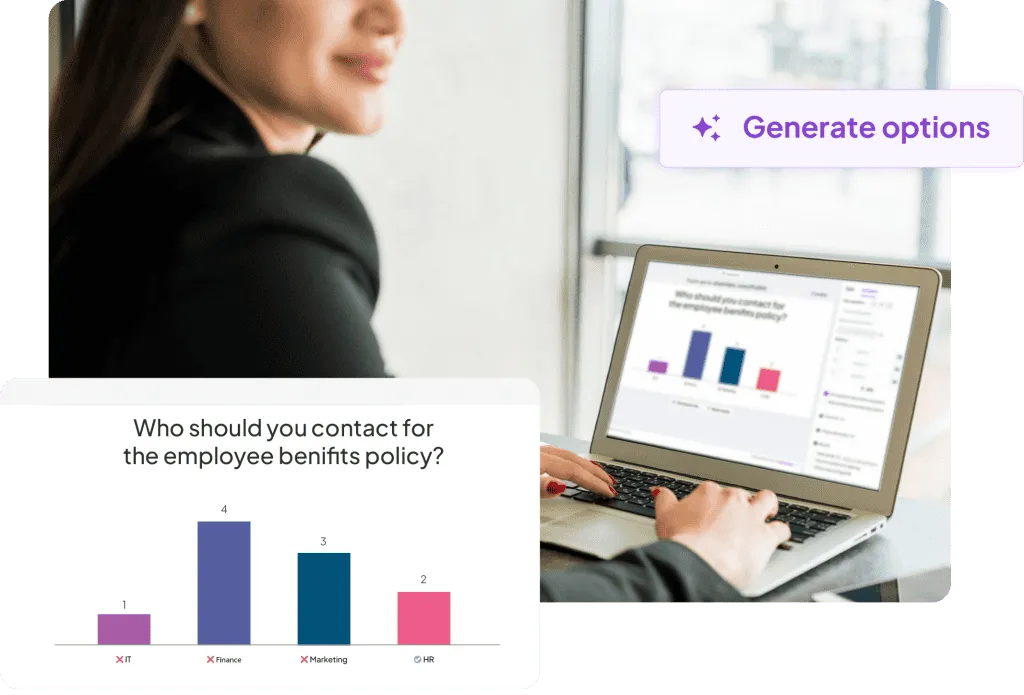
AhaSlides håndterer afstemninger, ordskyer, spørgsmål og svar og videnstjek-quizzer samlet ét sted. Undervisere bygger interaktive elementer sammen med deres præsentationsindhold, deltagerne svarer fra enhver enhed i realtid, og analysedashboardet viser svarfordelingen, når de kommer ind. Når afstemningsresultaterne viser, at størstedelen af rummet er på 4 ud af 10 på selvtillid, kan du se det og svare med det samme i stedet for at finde ud af det i en feedbackrapport tre dage senere.
Ofte stillede spørgsmål
Hvad er den ideelle længde for en virtuel træningssession?
60 til 90 minutter. For indhold, der kræver mere tid, opdel det i flere kortere sessioner over flere sammenhængende dage. Spredning i levering forbedrer fastholdelsen sammenlignet med enkelte lange blokke [3].
Hvordan får jeg stille deltagere til at bidrage?
Tilbyd flere bidragskanaler ud over verbalt: chat, anonyme afstemninger, emoji-reaktioner, fælles whiteboards. Grupperum på tre til fire opfordrer også til deltagelse fra personer, der forholder sig stille i store grupper.
Skal jeg kræve, at kameraer er tændt?
Spørg i stedet for at kræve. Forklar fordelen, anerkend legitime grunde til at afslå, og tilbyd kamerapauser i længere sessioner. At gå foran med et godt eksempel og have dit eget kamera tændt konsekvent gør mere end nogen politik.
Hvilket udstyr har jeg egentlig brug for?
Et 1080p webcam, et headset eller en ekstern mikrofon med støjreduktion, en stabil internetforbindelse med en mobil backup, tilstrækkelig belysning og en anden enhed til at overvåge chat.
Kilder
[1] Sitzmann, T., Ely, K., Brown, KG, & Bauer, KN (2010). Tekniske vanskeligheders effekt på læring og frafald under online træning. Personalepsykologi. ResearchGate
[2] Uddannelsesbranchen. Forskning i bedste praksis inden for virtuel facilitering og kameradeltagelse. træningsindustry.com
[3] Cepeda, NJ, Pashler, H., Vul, E., Wixted, JT, & Rohrer, D. (2006). Distribueret praksis i verbale genkaldelsesopgaver: En gennemgang og kvantitativ syntese. Psykologisk Bulletin, 132 (3), 354-380. APA PsychNet
[4] Kawasaki, G. PowerPoints 10/20/30-reglen. guykawasaki.com
[5] Roediger, HL, & Karpicke, JD (2006). Testforstærket læring: Hukommelsestests forbedrer langsigtet hukommelse. Psychological Science, 17 (3), 249-255. PubMed