您是否希望讓您的 PowerPoint 簡報看起來專業且易於識別?如果您想在 PowerPoint 投影片中新增浮水印,那麼您來對地方了。在這篇文章中,我們將深入探討水印的重要性。 PowerPoint 中的浮水印,提供如何在 PPT 中添加浮水印的簡單步驟,甚至向您展示如何在必要時刪除它們。
準備好釋放水印的全部潛力,將您的 PowerPoint 演示文稿提升到新的水平!
目錄
為什麼 PowerPoint 需要水印?
為什麼需要浮水印?其實很簡單。水印既是視覺品牌工具,又能提升幻燈片的專業外觀。它有助於保護您的內容,確立所有權,並確保您的訊息給觀眾留下深刻印象。
簡而言之,PowerPoint 中的水印是為演示文稿增加可信度、獨特性和專業性的重要元素。
如何在 PowerPoint 中添加水印
在 PowerPoint 簡報中新增浮水印非常簡單。以下是逐步指南:
步驟 1:打開 PowerPoint 並導航到要添加水印的幻燈片。
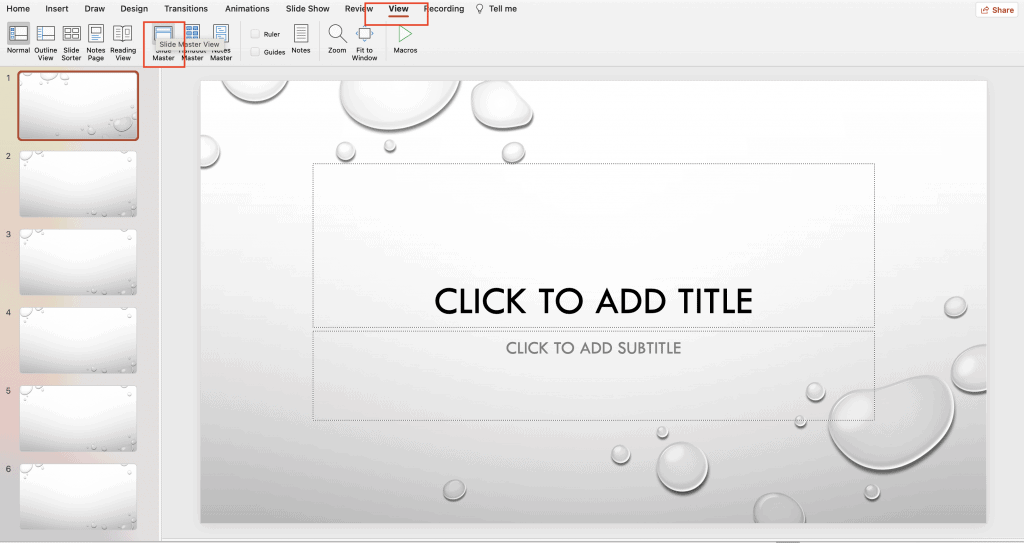
第一步: 點擊 “視圖” 頂部 PowerPoint 功能區中的選項卡。
第一步: 點擊 “幻燈片母版。「這將開啟投影片母版檢視。
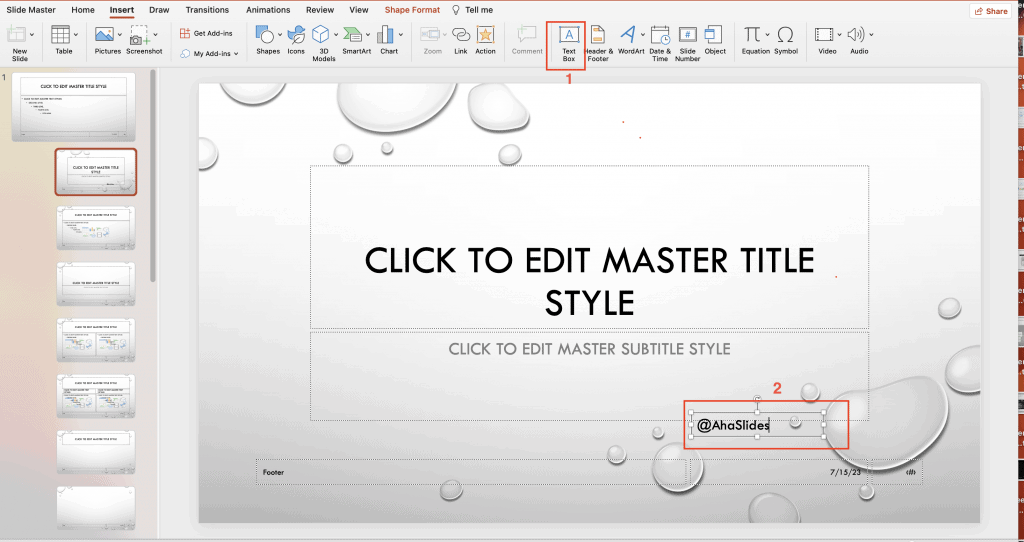
第一步: 點擊 “插入” 幻燈片母版視圖中的選項卡。

第一步: 點擊 “文本” or “圖片” 「插入」標籤中的按鈕,具體取決於您是否要新增基於文字或基於圖像的浮水印。
- 對於基於文字的浮水印,請選擇「文字方塊」選項,然後在投影片上點擊並拖曳以建立文字方塊。在文字方塊中輸入您想要的浮水印文本,例如您的品牌名稱或「草稿」。
- 對於基於圖像的水印,選擇 “圖片” 選項,瀏覽您的計算機查找您要使用的圖像文件,然後單擊 “插入” 將其添加到幻燈片中。
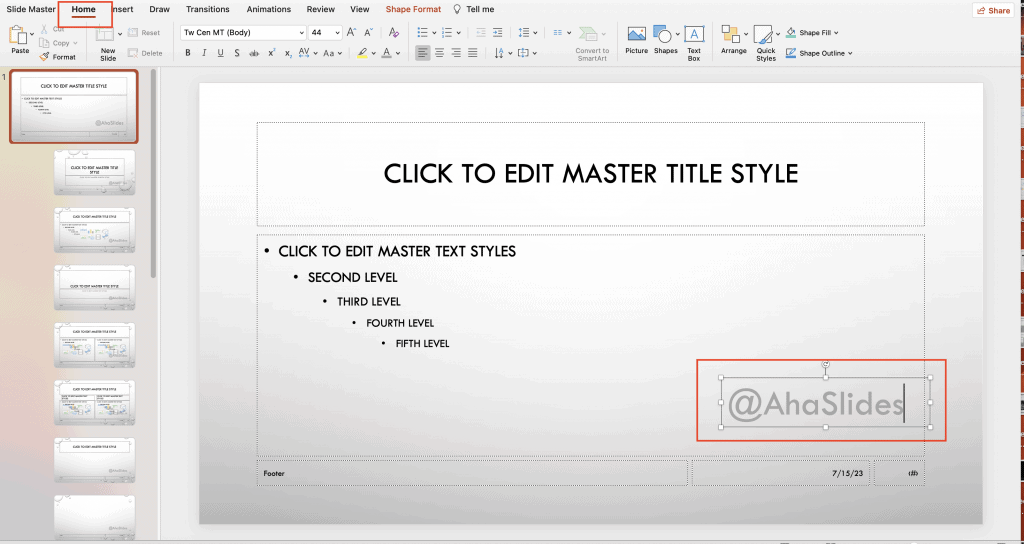
- 根據需要編輯和自定義您的水印。 您可以使用選項中的選項更改水印的字體、大小、顏色、透明度和位置。 “家” 標籤。
第一步: 對水印滿意後,單擊 “關閉主視圖” 按鈕在 “幻燈片母版” 選項卡退出幻燈片母版視圖並返回到正常幻燈片視圖。

第一步: 您的水印現已添加到所有幻燈片中。 如果您希望顯示水印,可以對其他 PPT 演示文稿重複此過程。
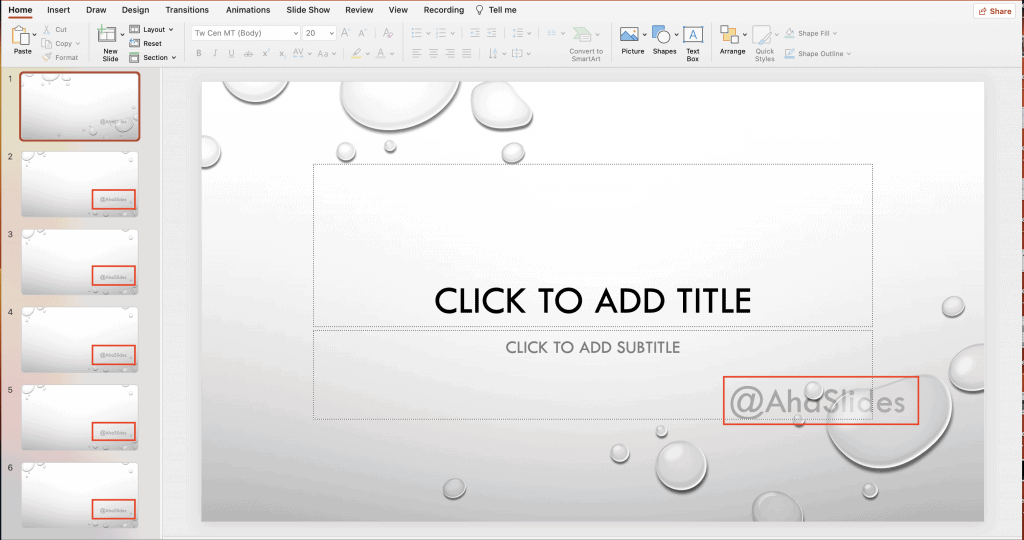
就這樣!按照這些簡單的步驟,你可以輕鬆地在 PowerPoint 簡報中加入浮水印,讓它更具專業感。
如何在 PowerPoint 中新增無法編輯的浮水印
要在PowerPoint中添加其他人無法輕易編輯或修改的水印,您可以使用以下一些技巧:
第一步: 打開 PowerPoint 並導航到要添加不可編輯水印的幻燈片。
第一步: 選擇 幻燈片大師 視圖。
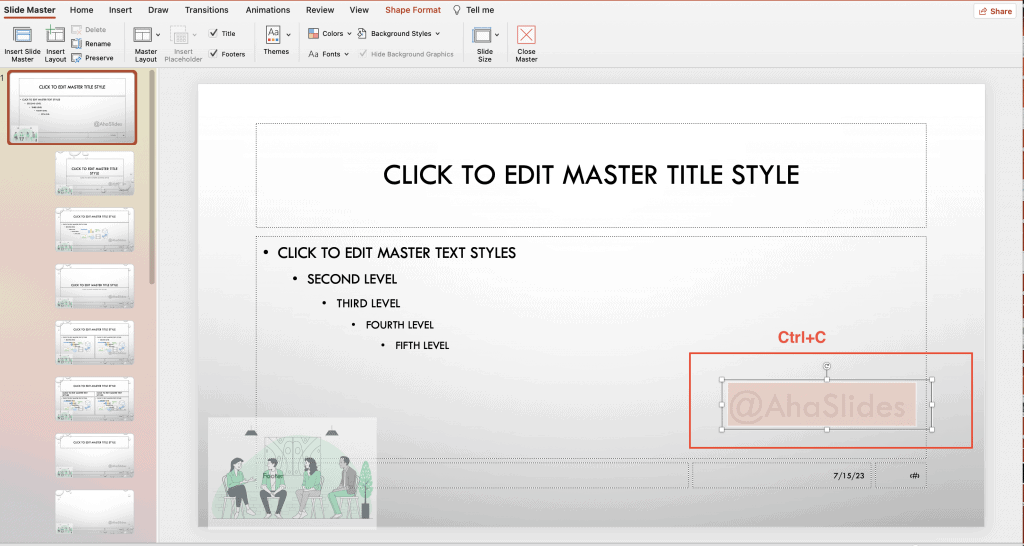
第一步: 複製您想要用作浮水印的“文字”或“圖像”選項。
第一步: 要使水印不可編輯,您需要通過複製將圖像/文本設置為背景 “ Ctrl + C”.
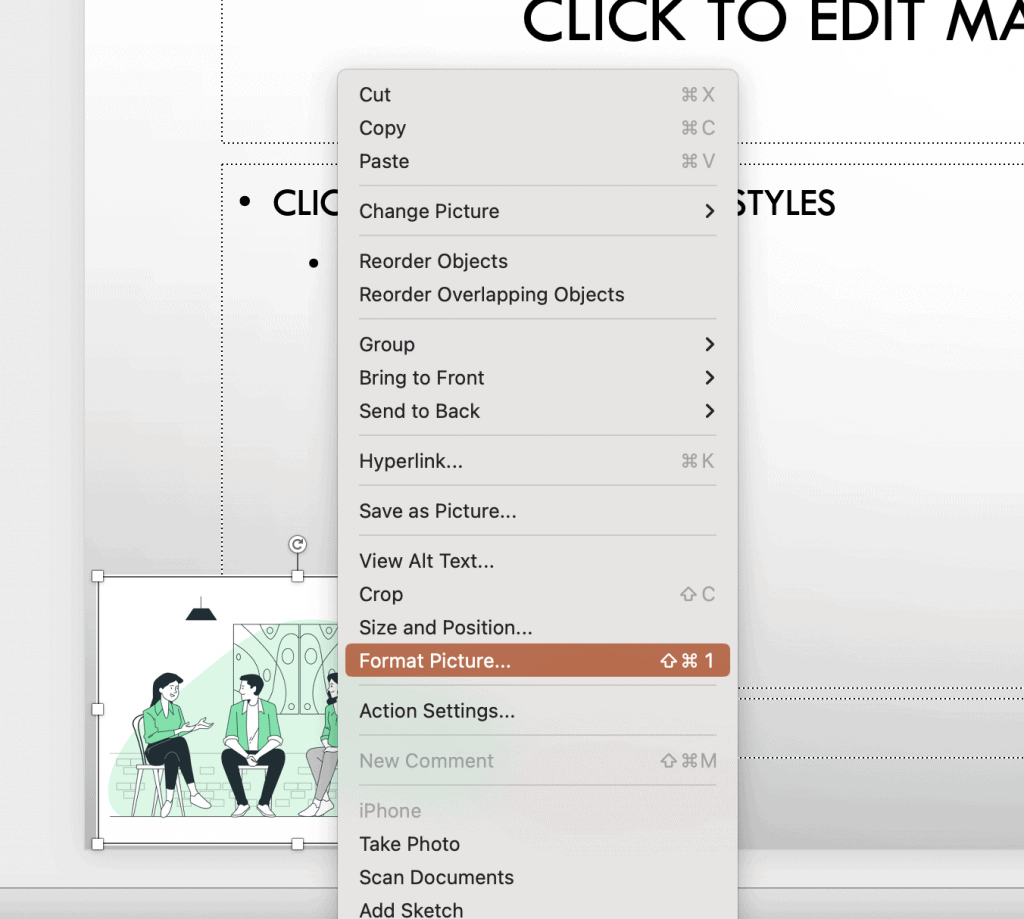
第一步: 右鍵單擊幻燈片的背景並選擇 “格式化圖片” 從上下文菜單。
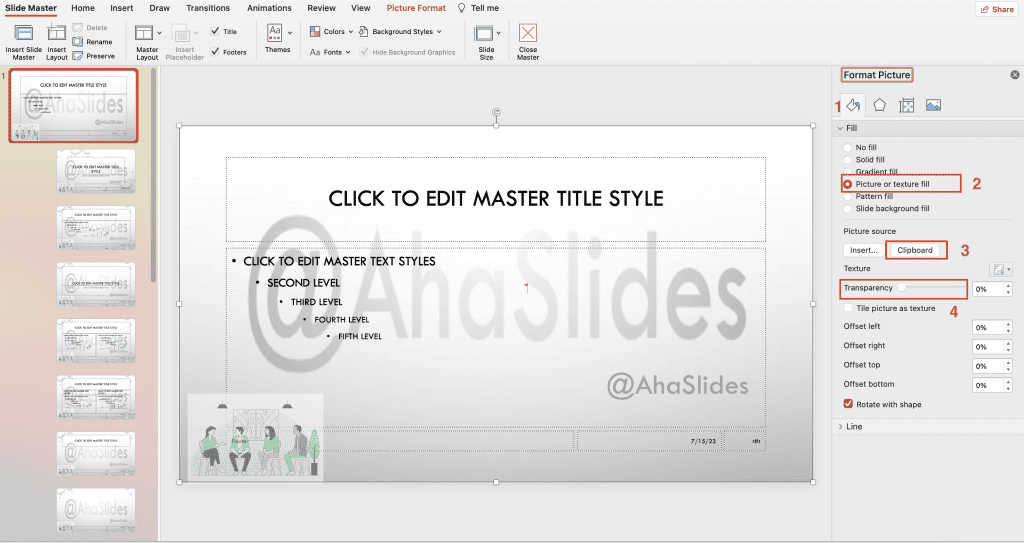
第一步: 在 “格式化圖片” 窗格,轉到 “圖片” 標籤。
- 勾選上面寫著的框 “充滿” 並選擇 “圖片或紋理填滿”.
- 然後點擊 “剪貼板” 框將您的文本/圖像粘貼為水印。
- 勾選 “透明度” 使水印顯得褪色且不那麼突出。
第一步: 關上 “格式化圖片” 窗格。
第一步: 保存 PowerPoint 演示文稿以保留水印設置。
通過執行以下步驟,您可以將水印添加到其他人難以編輯或修改的 PowerPoint 幻燈片中。
關鍵要點
PowerPoint 中的浮水印可以增強簡報的視覺吸引力、品牌效應和保護性,無論您使用基於文字的浮水印來表示機密性還是基於圖像的浮水印。
透過添加浮水印,您可以建立視覺標識並保護您的內容。所以,下次準備 PowerPoint 簡報時,別忘了利用浮水印的強大功能,並考慮加入 啊哈幻燈片 創造身臨其境的互動體驗。 AhaSlides功能 多種多樣,包括 現場投票, 測驗和 互動問答環節,讓您的簡報更具吸引力和互動性。
小提醒:使用 AhaSlides 是 Mentimeter 的最佳替代品之一,躋身前列 7 種 Menti 替代選擇 在2024!
常見問題(FAQ)
什麼是 Powerpoint 浮水印?
PowerPoint 投影片浮水印是半透明的圖像或文本,顯示在投影片內容的後面。這是保護智慧財產權的絕佳工具,也有助於解決版權問題。
如何在 PowerPoint 中新增浮水印?
您可以按照我們剛剛提供的文章中的 8 個步驟在 PowerPoint 中添加水印。
如何從 Windows 10 中的 PowerPoint 演示文稿中刪除水印?
基於 微軟支持,以下是在 Windows 10 中從 PowerPoint 演示文稿中刪除水印的步驟:
1. 在“主頁”選項卡上,打開“選擇窗格”。 使用“顯示/隱藏”按鈕查找水印。 如果找到就刪除。
2. 檢查投影片母版-在「檢視」標籤上,按一下「投影片母版」。尋找幻燈片母版和版式上的浮水印。如果發現,請刪除。
3. 檢查背景-在“設計”標籤上,點選“設定背景格式”,然後點選“純色填滿”。如果水印消失,則表示水印是由圖片填充的。
4. 要編輯圖片背景,請右鍵單擊“保存背景”,然後在圖像編輯器中進行編輯。 或者完全替換圖片。
5. 檢查所有幻燈片母版、佈局和背景以完全刪除水印。 找到水印元素後刪除或隱藏。


